Spinach Pierogi Recipe
Looking for a delicious and healthy twist on traditional pierogi? Look no further than spinach pierogi!
These savory dumplings are packed with nutrients and flavor, and are sure to become a new favorite in your pierogi repertoire.

The stuffing for these pierogi is a mix of spinach, garlic, and feta, but if you’re not into feta (or they don’t sell it in your local grocery store), cream cheese works well too.
Furthermore, you can make this recipe work even if you’re vegan. All you need to do is to skip the cheese entirely and double down on spinach and garlic. I cover that in more detail in the “Variations” section.
While making spinach pierogi requires some time and effort, the recipe is straightforward.
However, you should plan to spend at least one and a half to two hours cooking the pierogi. Preparing the dough, the filling, and forming the dumplings takes at least that long, at least in my experience.
For this reason, I make pierogi on weekends and always cook a double batch to have enough for another dinner or two during the week.
(If you’re looking for something you could cook on a busy weeknight, polish lazy pierogi are a much better option, as they take only about 30 minutes to whip.)
Whether you’re a die-hard pierogi fan or just looking for a new way to incorporate leafy greens into your diet, spinach pierogi are a must-try. So roll up your sleeves and get ready to enjoy a taste of Poland right in your own home!
If you’re making spinach pierogi for the first time, read the ingredients notes, step-by-step instructions, and tips. If you’re a veteran, feel free to jump to the recipe card.
First time making pierogi? Check out our guide to homemade pierogi to learn everything you need to know about the process.
Ingredients Notes and Substitutes

- Pierogi dough. You’ll need one portion of my best pierogi dough to cook these spinach pierogi. Or use another recipe if you already have a favorite one. Just make sure you use about two cups of flour so that you have enough dough to wrap all the filling.
- Spinach. Frozen chopped spinach is the best option because it’s already cut and you can just throw it into the skillet and wait a few minutes until it melts. If you’re using fresh spinach, chop it before you cook it.
- Salt. I use fine-grained salt, but any other should do too.
- Pepper. Regular ol’ black pepper is all you need.
- Feta Cheese. Feta cheese and spinach complement each other well, so using feta is what I recommend. However, if you don’t enjoy feta’s tangy and acidic taste, you can substitute it with cream cheese. The flavor will be more mellow, and it’s more likely that you will have cream cheese in your fridge. Alternatively, you can combine half feta and half cream cheese for something that’s in-between flavor-wise.
- Garlic. Spinach and garlic are a classic combination. If you love garlic, add more cloves than the recipe calls for. And if you don’t have fresh garlic, you can use garlic powder instead. Add a teaspoon when cooking the spinach, and taste for flavor after adding and melting the cheese.
- Butter. I like cooking spinach in butter, but if cooking oil or olive oil is your jam, feel free to use it instead.
Step-By-Step Instructions
- Prepare the dough. Use my best pierogi dough recipe, or go with your favorite one. Since I recommend letting the dough rest for 30 minutes before using, it’s best to start by preparing it.

- Place a non-stick skillet on low heat and add a tablespoon of butter or oil. Once the butter has melted, add the frozen spinach and let it thaw slowly. If the frozen garlic starts to scorch, add a bit more fat or water.

- Peel and mince or crush the garlic cloves. Once most of the water has evaporated from the spinach (i.e., it’s almost cooked), add the salt, pepper, and garlic to the skillet. Stir to combine.

- Dice or crumble the feta and add it to the garlicky spinach, then stir. Cook and stir until the cheese starts to melt and form a cohesive paste with the spinach.

- Taste the cooked filling and add more salt, pepper, or acid (such as lemon juice or apple cider vinegar) if needed. I usually don’t add anything at this point, but if you’re using cream cheese instead of feta, you might need extra salt or acid to adjust the flavor.

- Take the filling off the heat and let it cool down for at least 20 minutes before proceeding. This will allow any extra water to evaporate.
- Divide the pierogi dough into two or three parts. Take one part and spread it on a floured work surface, then roll it out until it’s nice and thin. Be careful not to roll it too thin, as it may tear when you form the pockets and seal the dough around the filling. Wrap the rest of the dough tightly to prevent it from drying out.

- Cut palm-sized circles in the rolled pierogi dough. Anything round with a somewhat sharp edge is great, but a simple glass or mason jar works as well. Or use your pierogi maker if you have one. Form a ball with the dough left over after cutting and use it when rolling out the rest of the pierogi.

- Place a spoonful of the filling in the middle of the dough circle, then fold the dough over the filling and press the edges together starting in the middle. Try to leave as little air as possible in the pocket you’re forming. To make a good seal, moisten the outer edge of the dough using a wet finger before pressing the edges together.
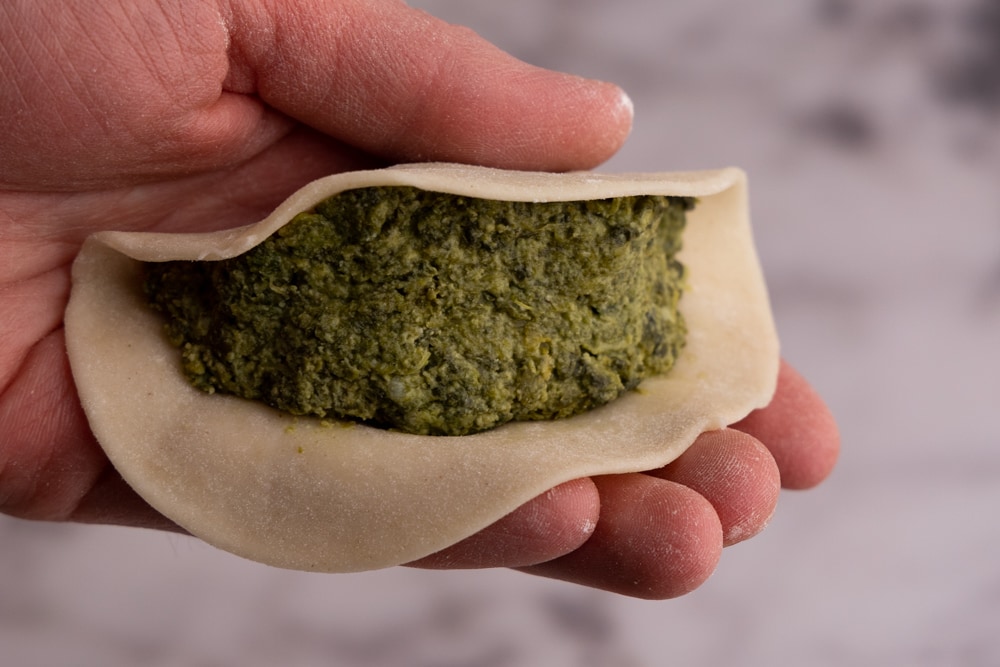 Making a pocket with pierogi dough
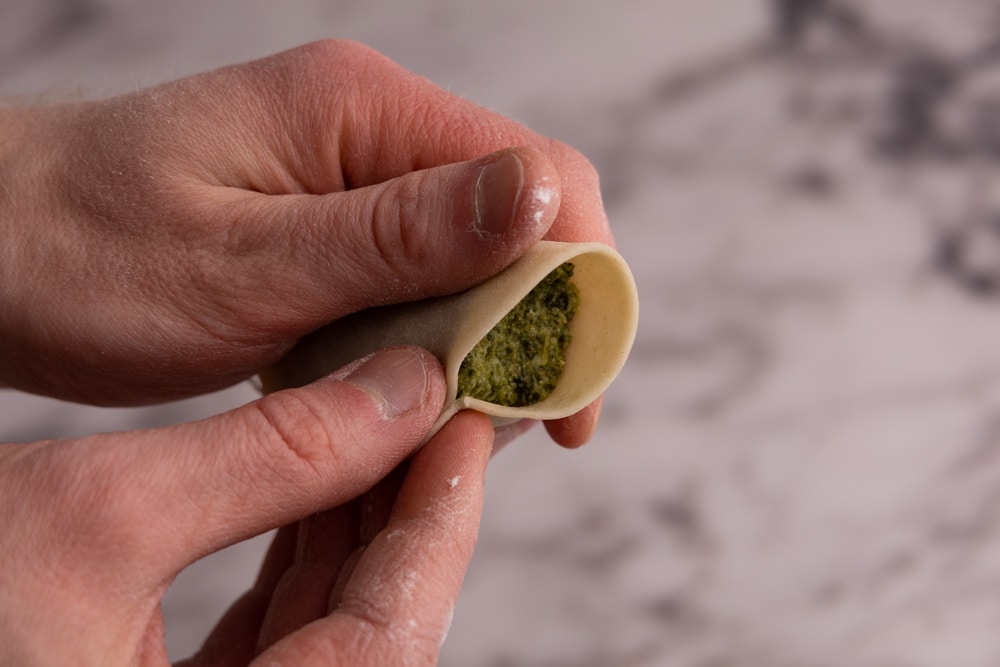 Forming spinach pierogi with hands
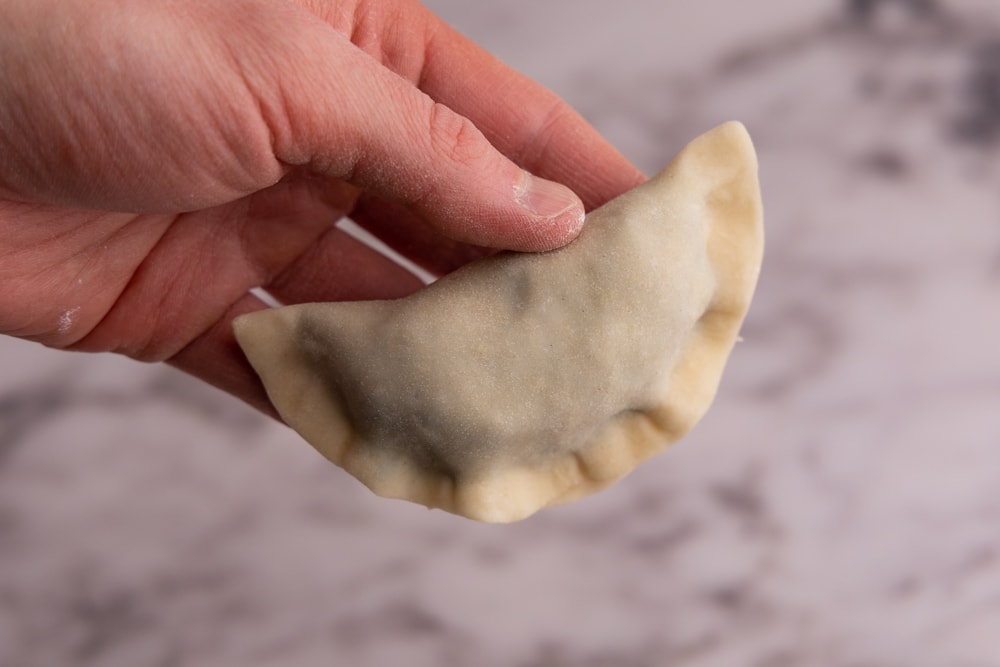 Hand formed spinach pierogi
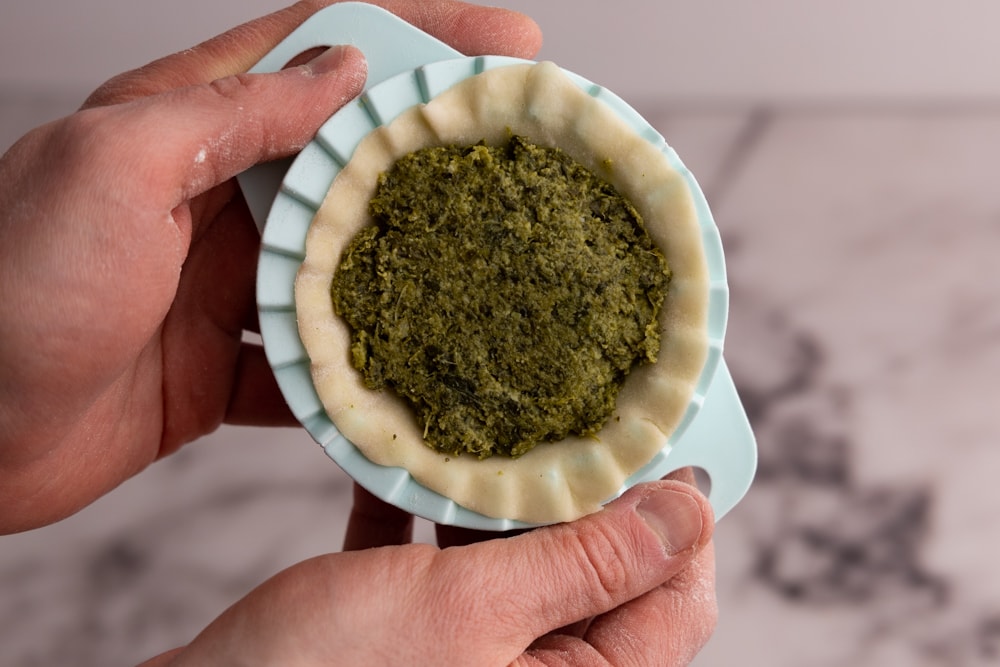 Forming spinach pierogi using a pierogi maker
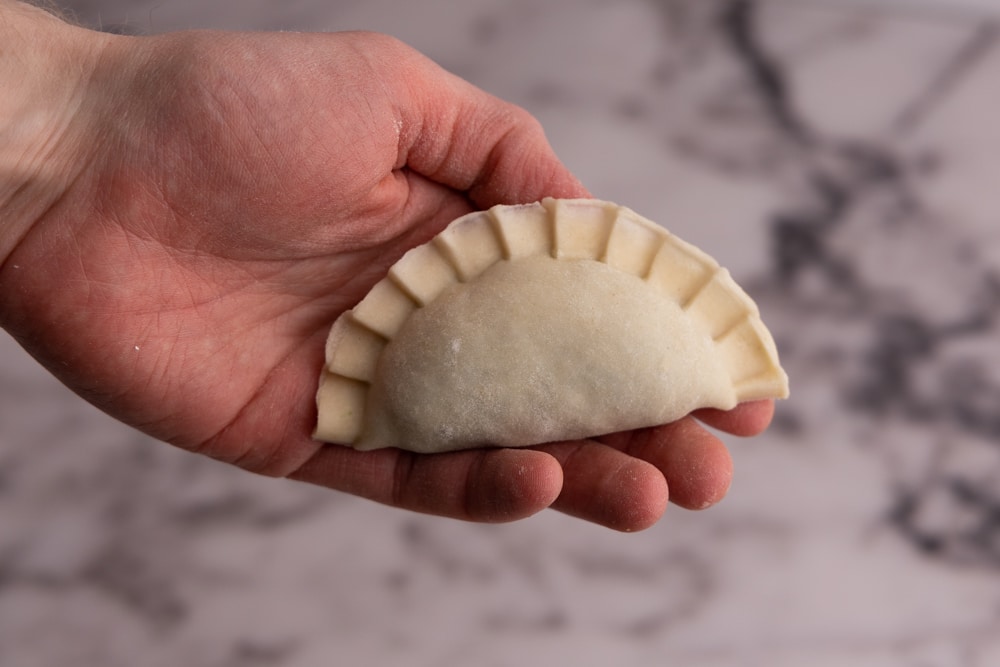 Pierogi maker formed spinach pierogi


- Place each formed pierogi on a floured cookie sheet and cover them with a damp kitchen towel. The edges will dry out quickly otherwise. If you want to save space and let the pierogi touch each other, lightly brush the areas where they’ll touch with flour. This will prevent them from sticking together and causing the pierogi dough to tear when removed for boiling.

- Continue forming pierogi until you run out of dough or filling.
- Bring a large pot of salted water to a boil. I typically use one teaspoon of salt per quart of water but feel free to adjust the amount to your preferences.
- Once the water is boiling, add a few pierogi to the pot and stir them to prevent them from sticking to the bottom. Once the pierogi start floating to the surface, simmer them gently for another 3 to 4 minutes. Make sure not to overcrowd the pot so that the pierogi don’t stick together or cook unevenly.

- Remove the pierogi from the water using a slotted spoon and serve.

Recipe Tips
- After cooking, taste the filling and adjust the seasoning as necessary to ensure it tastes great. Using a lackluster filling will result in lackluster pierogi.
- Consider making a larger batch of pierogi by doubling the dough and filling or using a different filling (here’s our list of pierogi fillings) for the second half of the dough to save time on future meals. This meat pierogi recipe might be a great option if you’re looking for a meat-heavy main, or these lentil pierogi or apple pierogi if you’re looking for a vegan-friendly pierogi option.
- For an extra burst of flavor and texture, try pan-frying the pierogi after boiling them until they’re lightly browned on both sides.
- Give the pierogi some time to rest and let the flavors meld. They taste even better the next day after cooking.
- If the filling seems too soft to work with, refrigerate it for at least an hour before using it. This will help it firm up and make shaping and filling the pierogi easier. I typically prep the filling the day before I cook the pierogi and refrigerate it overnight.
- Make sure to have a small bowl of water nearby when forming the pierogi. That water will allow you to quickly moisten the outer edge of the dough, helping it stick better.
- There will be leftover dough or filling when making pierogi. That’s the nature of the beast. The amount of dough and filling required depends on various factors, making it difficult to provide exact measurements. If there is a large amount of leftover dough, you can freeze it later. But if there’s only enough for a few pierogi, you can discard it. For the leftover filling, I recommend freezing it and using it when making the next batch of pierogi.
- Start boiling the water after you’ve used about half of the filling, and start cooking the pierogi as soon as it boils. Drop a few pierogi into the pot, stir them, and continue rolling the dough and forming the pockets, checking how the cooking pierogi are doing every minute or so.

Variations
- Make it vegan. To make this recipe vegan, omit the feta cheese and replace butter with olive oil. This will create a similar flavor to this garlic sauteed spinach recipe, which can work well as a pierogi filling after blending or processing in a food processor. If you enjoy garlicky spinach, you’ll enjoy it in the pierogi as well. Just remember to double the amount of spinach so that you don’t run out of filling halfway through.
What to Serve With Spinach Pierogi
- Melted butter. This is the easiest possible topping and takes only a minute or two to prepare. Alternatively, if you’re pan-frying the pierogi before serving, pour any remaining butter from the pan over them.
- Sour cream. Sour cream is one of the most popular pierogi toppings, and serving your spinach pierogi with a dollop of sour cream is a great option, especially if you substitute feta with cream cheese or skip the cheese whatsoever. If you go with feta as suggested, choosing something with a more neutral flavor, like yogurt, might be a better option.
- Sauteed or boiled Polish kielbasa. If you’re looking for a heartier meal, consider serving spinach pierogi with sliced boiled or sauteed Polish sausage on the side. The smoky, savory flavors of the sausage complement the pierogi nicely, and the combination is sure to leave you feeling satisfied. If sauteeing, add an onion or two and let it cook for a few minutes before adding the sliced kielbasa.

Storage
To store spinach pierogi, let them cool and dry individually on large plates.
After 15 to 20 minutes, flip them over to ensure that both sides dry evenly. Once completely dry, transfer them to an airtight container, arranging them in a single layer and ensuring they are not touching each other too much (a bit is okay) to avoid sticking together.
If you need to stack the pierogi, separate each layer with parchment paper or plastic wrap.
Alternatively, you can freeze leftover pierogi for later use.
Reheating
To reheat spinach pierogi, start by heating a non-stick skillet over medium-low heat and add a few tablespoons of butter or oil to thinly coat the surface of the skillet.
Once the skillet is preheated, add the pierogi to the skillet, making sure not to overcrowd the pan. Next, cover the pierogi with a lid and cook them for 12 to 15 minutes, flipping them halfway through to ensure they heat evenly.
Be sure to shake the skillet every couple of minutes to prevent the pierogi from sticking to the bottom.
For a crispier texture, increase the heat slightly or leave the pierogi on the skillet for a bit longer, flipping them only after one side is nicely browned.
Enjoy!
Spinach Pierogi

Ingredients
- 1 batch pierogi dough
- 1 pound frozen spinach ~450g
- 7 oz feta cheese or cream cheese
- 3 tablespoons butter or oil
- 3 garlic cloves
- ¼ teaspoon salt
- ¼ teaspoon pepper
Instructions
- Prepare the pierogi dough using your favorite recipe or use the best pierogi dough recipe.
- Melt butter in a non-stick skillet, add frozen spinach, and thaw. Add more fat or water if needed.
- Add minced garlic, salt, and pepper to the skillet once the spinach water has evaporated. Mix well.
- Add diced feta to the spinach mixture, cook until cheese melts and forms a paste with spinach.
- Taste the filling, adjust salt, pepper, or acid if needed, especially if using cream cheese.
- Let the filling cool for 20 minutes to evaporate extra water before using.
- Divide the pierogi dough into two or three parts. Then, spread one on a floured work surface and roll it out until it’s thin. It shouldn’t be super thin so that you can still stretch it when forming the pockets.
- Cut palm-sized circles in the rolled pierogi dough using a cookie cutter or glass.
- Place a spoonful of spinach filling in the center of each dough circle. Fold the dough over the filling and press the edges together, starting in the middle. Leave as little air as possible in the pocket you're forming. To help form a good seal, moisten the outer edge of the dough using a wet finger.
- Place each formed pierogi on a floured cookie sheet and cover them with a damp kitchen towel.
- Bring a large pot of salted water to a boil. I typically use one teaspoon of salt per quart of water but feel free to adjust the amount to your preferences.
- Once the water is boiling, add a few pierogi to the pot and stir them to prevent them from sticking to the bottom. Once the pierogi start floating to the surface, simmer them gently for another 3 to 4 minutes. Make sure not to overcrowd the pot so that the pierogi don’t stick together or cook unevenly.
- Remove the pierogi from the water using a slotted spoon and serve immediately with your favorite toppings.


